If you’ve ever stood outside your home in Kohler, WI and thought, “Something feels a little tired,” the answer might be right around your windows. Faded or peeling trim can quietly take away from your home’s charm, even if everything else looks great.
Learning how to paint exterior window trim is one of those small upgrades that makes a big difference. It brightens your exterior, protects against weather, and brings back that clean, finished look every homeowner loves.
The thing is, painting window trim isn’t just about brushing on a new color. It’s about timing, materials, and knowing what your trim needs before the first coat goes on.
Let’s break it down so you’ll know what really matters before getting started.
Key Takeaways:
- Prepping your trim by cleaning, sanding, and repairing cracks ensures long-lasting adhesion and smooth results.
- Choosing the right primer and exterior acrylic paint helps protect against moisture, mildew, and peeling.
- Different materials like wood, metal, and vinyl trims require specific paint types and techniques.
- Proper timing matters—paint during mild weather for best drying and durability.
Understanding The Types Of Exterior Window Trim
Before learning how to paint exterior window trim, it’s good to understand what you’re working with. Each trim type behaves differently when exposed to paint, primer, and weather.
- Wood Trim. The most common type, but it needs the most attention. Wood expands and contracts with weather changes, so a high-quality primer and durable exterior acrylic paint are a must.
- Metal Trim. You’ll see this around modern homes or commercial buildings. It resists rot but can rust if not treated. Removing rust before painting keeps it from spreading.
- Vinyl Trim. Low-maintenance but tricky for paint to stick to. Only certain primers and paints will bond properly for good adhesion.
Choosing the right products matters as much as technique. Brands make durable options designed for tough weather and better color retention, perfect for Wisconsin’s changing climate.
How To Paint Exterior Window Trim?
Why Proper Prep Matters
No matter how great the paint is, it won’t last if the surface isn’t ready. Proper preparation builds the foundation for strong adhesion and a smooth finish. A clean, dry surface helps your new coat of paint stick properly and prevents peeling later on.
Start by washing away dirt, dust, and mildew using mild soap and water. Then, inspect the trim. Any peeling, cracked, or faded areas need extra care. If your trim has old layers of paint that flake off easily, remove them. For wood surfaces, use sandpaper to smooth out rough spots. Metal trim may need sanding too, especially if you spot rust.
This is also the perfect time to fix small problems before they get worse. Fill nail holes or cracks using a putty knife and exterior filler, then smooth the surface once it dries. Gaps between the trim and siding can be sealed with caulk to prevent water from seeping in and causing damage later.
Step 1: Sand And Clean
A smooth surface is key to getting a professional finish. Use medium-grit sandpaper to remove imperfections, then finish with a finer grit to create an even texture. After sanding, wipe away all dust using a damp cloth so the surface is clean before painting. Skipping this step can cause uneven coverage or visible marks once the paint dries.
If you’ve been painting other areas of the house, check out How Long Does Spray Paint Take To Dry for a better sense of timing when working around windows and trim.
Step 2: Apply Primer
The primer acts as a bridge between your trim and the paint. It helps improve adhesion, especially on wood or metal, and blocks out stains or previous colors. Use a high-quality primer that’s made for exterior surfaces.
For wood trims, an oil-based or acrylic bonding primer works well. For metal, pick one that specifically prevents rust. Let the primer dry completely before painting—it’s worth the wait for a smoother, longer-lasting result.
Step 3: Choose The Right Paint
Once the primer is dry, you’re ready for color. Exterior acrylic paint is usually the best choice since it holds up against changing weather. Gloss or semi-gloss finishes are great for trims because they’re easy to clean and resist moisture.
If you’re unsure which color to use, try experimenting with Paint Color Visualizer to see how different shades look next to your home’s siding and windows. It helps you find the perfect tone before making the commitment.
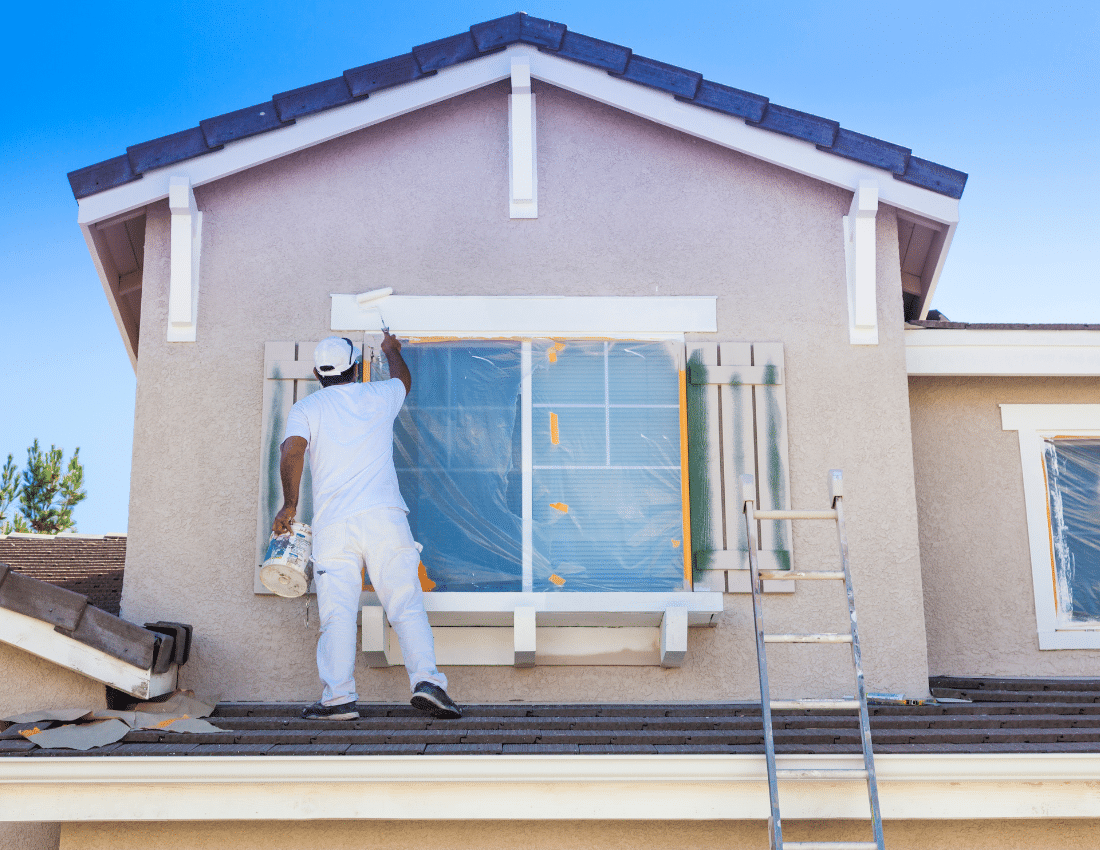
Step 4: Time To Paint
Now comes the fun part. Grab a quality brush—a small angled one works best for narrow trim edges. Dip the brush about a third of the way into the paint, then apply even strokes along the grain for wood or in one direction for metal.
Work in sections, starting from the top so any drips can be fixed as you go down. Keep your layers thin. Two light coats will always look better and last longer than one thick one.
If you’re working on trim near siding or brick, painter’s tape can help keep clean lines. Allow the first coat to dry completely before applying the second. Check the label for drying times; this varies depending on weather and paint type.
Step 5: Finishing Touches
Once the final coat is dry, peel off any tape and look over your work. If you notice small gaps or uneven areas, a light touch-up can make everything look seamless.
Cleaning is the last but most overlooked part. Wash your brushes well and store leftover paint in a sealed container for future touch-ups. Regular maintenance keeps your trim looking sharp year-round.
If you’re thinking about updating other parts of your home exterior, our post on Best Paint Finish for Trims and Shutters can help you pick finishes that work together for a consistent look.
What Affects The Cost And Longevity
Many homeowners ask how much they should budget for projects like this. While prices vary depending on trim size, material, and prep work needed, professional painting is an investment that pays off over time. For a deeper look at pricing factors, check our article on How Much Does It Cost to Paint the Exterior of a House.
Long-lasting results depend on three main things: good prep, quality materials, and the right weather.
Avoid painting during extreme heat or cold. In Kohler, WI, early summer or early fall usually provides the best conditions for smooth application and drying.
Final Thoughts
Learning how to paint exterior window trim is more than a cosmetic task. Clean surfaces, strong primer, and well-chosen paint all make a big difference in how long the finish lasts.
If your trim is peeling, fading, or showing rust, it’s time for a refresh. A well-painted window frame doesn’t just make your home look better; it also prevents future problems caused by moisture and weather.
At S&S Painting & Restoration, we’ve handled countless exterior projects across Kohler, WI, from vintage homes to modern builds. Our goal is to protect your home’s surfaces while keeping them beautiful.
Here’s what our process looks like:
- Inspection of your window trim and surrounding areas
- Cleaning to remove dust, sand, mildew, and loose paint
- Surface prep using sandpaper and repair tools like a putty knife
- Priming for strong adhesion and smooth finish
- Applying two coats of high-quality Behr exterior paint
- Clean-up and final check for flawless detail
We proudly serve Cedarburg, North East Milwaukee, Sheboygan Falls, WI, and nearby areas.
Reach us at 920-332-5772 for your FREE estimate and let’s keep your home looking its best year-round.