If you’re looking for a bold way to upgrade your walls, you’ve probably come across color blocking. It’s one of the easiest ways to turn your interior house painting project into a statement-making masterpiece. Wondering how to color block with paint without making a mess of your space? Good news: it’s easier than you think—and way more fun than you’d expect.
Key Takeaways:
- Color blocking adds instant personality and style to any room.
- No need to be a pro—this DIY is beginner-friendly.
- You only need a few tools to get started.
- The right prep work makes all the difference.
- You can go subtle or bold depending on your color choices.
What Is Color Blocking, Anyway?
Color blocking is the technique of painting large blocks or sections of color on your wall to create contrast, highlight architectural features, or just have a little fun with paint. Think of it as painting with purpose—big swaths of color that give your space a modern, artistic vibe.
It’s popular in fashion and graphic design, but when you bring it into your home, it turns a boring wall into a focal point. And it doesn’t just have to be rectangles. Arches, stripes, circles—you name it, you can block it.
Why Homeowners Love It
Homeowners love color blocking because it’s an affordable, creative way to transform a space without a full remodel. It works in living rooms, bedrooms, hallways—even kitchens. Plus, it’s flexible. Want a soft pastel arch over your bed? Go for it. Prefer sharp geometric angles in bold primary colors? You can do that too.
It’s especially appealing if you’re tackling an interior house painting project and want something more exciting than a plain beige wall. This is where color blocking shines.
What You Need to Get Started
Before you break out the paint cans, here’s a quick list of what you’ll need:
- Painter’s tape
- A level or measuring tape
- Pencil
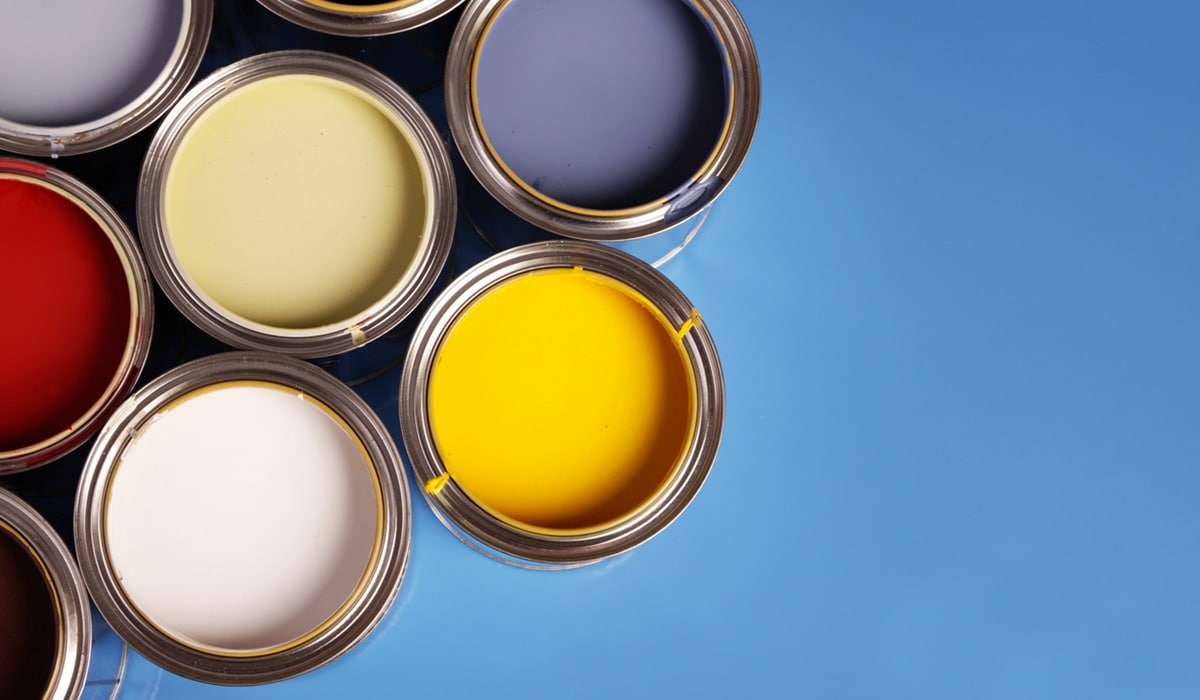
- Paint (at least two contrasting colors)
- Roller and brush
- Drop cloths
- Sandpaper (optional for smoothing surfaces)
Tip: Don’t skip the painter’s tape. It’s your best friend for clean lines.
How to Color Block with Paint: A Step-by-Step Guide
Color blocking may look like something only a professional painter can pull off, but it’s totally achievable for DIYers with a bit of planning and patience. Here’s a step-by-step guide to help you get crisp lines, vibrant color, and a design that pops.
1. Pick Your Colors
Choose contrasting colors for bold, eye-catching effects or go with complementary tones for a more subtle and calming vibe. Think about the kind of energy you want the room to give off—vibrant colors like red and yellow create excitement, while cooler tones like blue and green offer a more relaxing feel.
Use a color wheel or online palette tools to explore combinations you might not have considered. Also, factor in how natural and artificial light affects the paint throughout the day, and consider your existing furniture and decor to ensure everything works together in harmony.
2. Plan Your Design
Use painter’s tape and a pencil to lightly outline your shapes or sections on the wall. This step is your roadmap, so take the time to get your layout right. If you’re aiming for straight lines, use a level or measuring tape to ensure precision—this is key for a polished, symmetrical look.
For curves, arches, or more organic shapes, try creating a cardboard template you can trace, or sketch it out freehand if you’re comfortable. The goal is to map out your design clearly so that your paint goes exactly where you want it.
3. Prep the Wall
Start by thoroughly cleaning the wall with a damp cloth or mild soap solution to remove dust, grease, or residue that could interfere with paint adhesion. Once the surface is clean, inspect it closely for any dents, holes, or cracks. Use spackle or wall filler to repair imperfections and let it dry completely before sanding.
If you’re painting over a dark or bold color, applying a primer can help your new colors pop and provide a uniform base. Sand any rough patches or previous paint drips to create a smooth surface—this will help your painter’s tape stick better and ensure clean lines.
4. Tape It Out
Apply painter’s tape to the outer edges of your design, whether you’re working with geometric shapes or freeform curves. Make sure the tape is aligned precisely with your design outlines, especially for straight lines or sharp corners. Press the tape down firmly with your fingers or a flat edge to seal it tightly to the wall—this helps prevent paint from bleeding underneath.
Use a level or measuring tape to keep lines crisp and accurate, particularly when working with horizontal or vertical designs. Taking your time in this step will pay off with professional-looking results.
5. Paint!
Start with your lighter color if you’re layering multiple shades. This creates a clean base and makes it easier to paint over any areas that need touch-ups. Use a brush to carefully cut in along the taped edges and corners, then switch to a roller for filling in the larger sections of your design. Work in even strokes to avoid streaks and roller marks. Let the first coat dry completely—usually a few hours—before deciding if a second coat is necessary for full coverage and a rich, even finish.
6. Peel and Reveal
Once the paint is dry to the touch—typically after a few hours, depending on the type of paint and humidity—gently peel off the painter’s tape. Start at one corner and slowly pull the tape back on itself at a 45-degree angle. This technique helps keep your edges sharp and prevents the paint from lifting or tearing. If you notice any resistance or sticking, use a utility knife to lightly score along the tape line as you peel.
7. Touch Up
If any paint bled under the tape, don’t worry—it happens even to the pros. Use a small, angled brush to carefully touch up any uneven lines or smudges with the original wall color or the accent color, depending on the area that needs fixing. Take your time here; clean lines are what make color blocking look sharp and intentional.
Once you’re satisfied, step back and admire your work. You’ve just created a custom feature wall that’s guaranteed to turn heads—it’s a total game-changer.
Design Ideas to Spark Inspiration
Here are a few creative ways to use color blocking that go beyond just painting a single wall. These ideas can help inspire your next project:
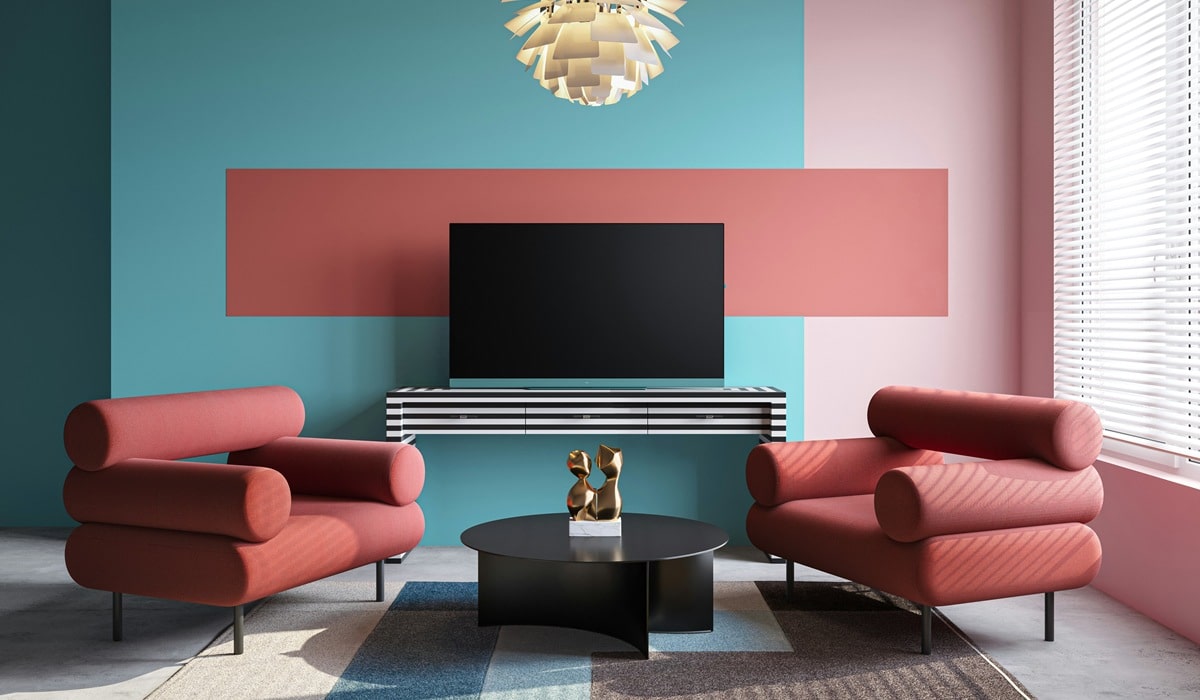
- Two-Tone Walls: Paint the bottom third in a deeper color to ground the room and add visual structure. It’s a simple way to add sophistication without going over the top.
- Wall Arches: A painted arch above a bed, desk, or reading nook creates a cozy, defined space. It’s a playful and modern alternative to a headboard or framed art.
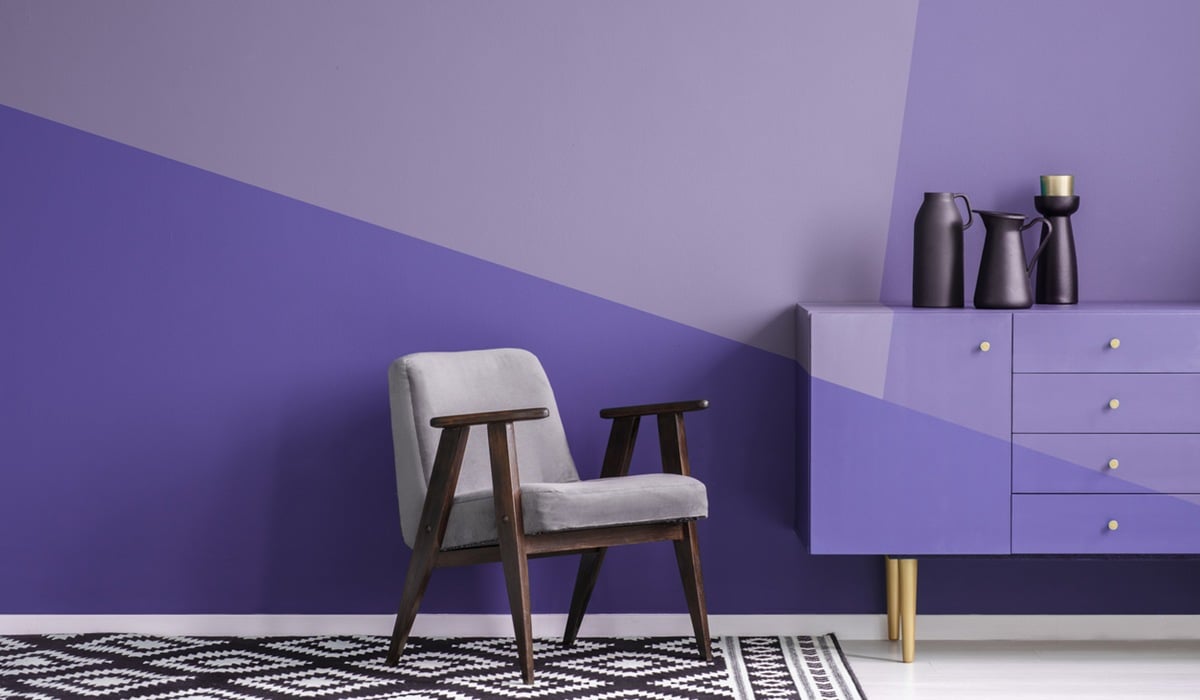
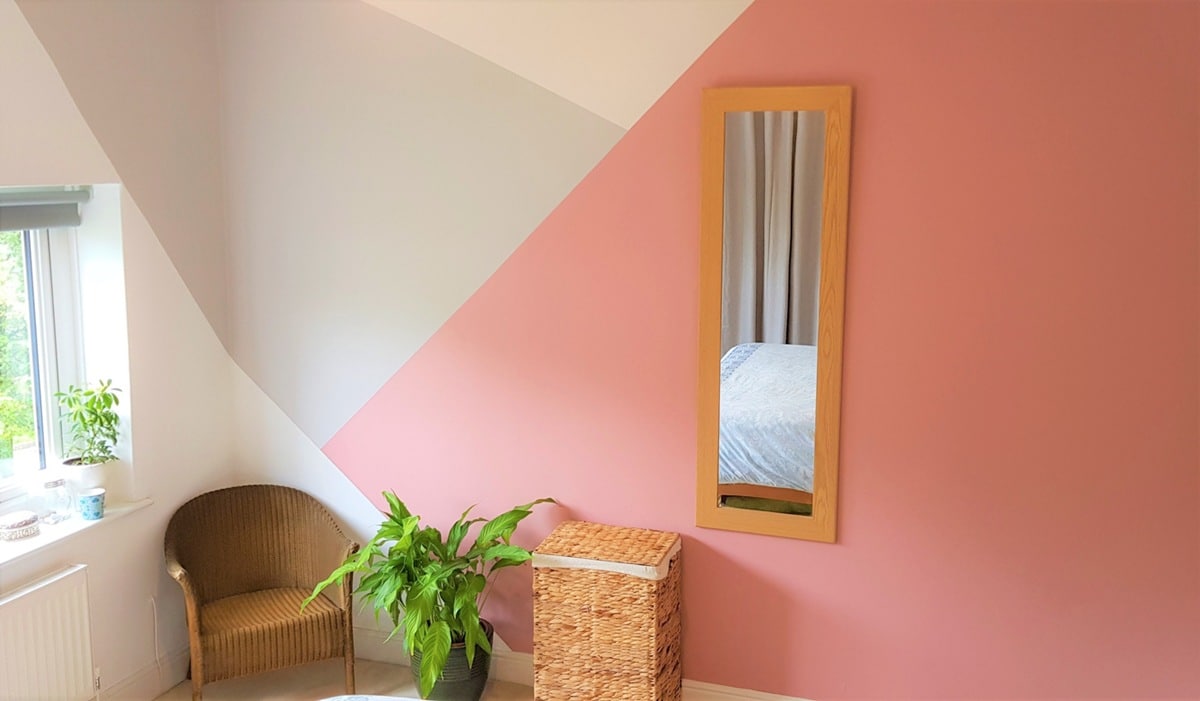
- Diagonal Splits: Slanted lines of color bring energy and a modern edge to any room. Great for accent walls or spaces that need a dynamic feel.
- Ceiling Accents: Extending your color block onto the ceiling can add drama and depth. It’s a bold move that pays off in spaces like dining rooms or entryways.
Common Mistakes to Avoid
Before you start your project, it’s important to know what pitfalls to avoid. These common mistakes can make or break your final result, so keep an eye out:
- Rushing the taping process: If you don’t take the time to tape carefully, your lines will likely be uneven or smudged.
- Not letting paint dry before adding tape or a second color: Impatience here can lead to paint peeling off with the tape or unwanted smudges.
- Picking clashing colors without testing them first: What looks good on a swatch might not work in your space. Always test a small area first.
- Forgetting to account for furniture placement: Make sure your design makes sense with the layout of your room and won’t be hidden behind large items.
Avoid these, and your project will look like it was done by a pro.
Ready to Paint? Let’s Do This
Whether you’re new to DIY or just looking for a fresh idea, color blocking is the answer to boring walls. This interior house painting project lets you express your personality with just a few tools and a weekend. It’s affordable, impactful, and totally customizable.
Want help picking the right colors or getting that crisp professional finish? S&S Painting & Restoration is here to guide you from inspiration to execution. Call us at 920-332-5772 and let’s bring your walls to life.